
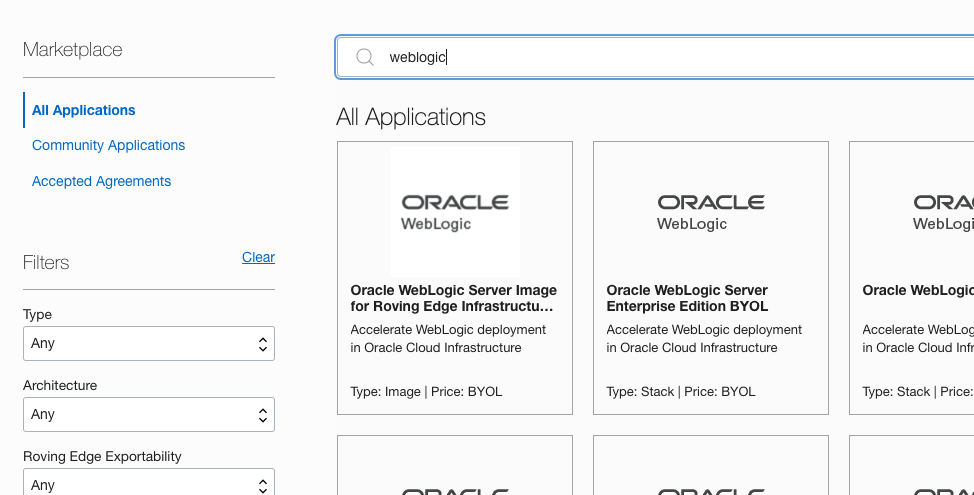
Creando un Weblogic Server for OCI
Se puede crear un weblogic server desde el MarketPlace de OCI.
Prerrequisitos:
- Crear un Compartment.
- Crear las Policies necesarias. (*)
- Crear una Encription Key.
- Crear los Secrets necesarios (consola).
- Crear (o disponer ya de) una SSH Key.
Tareas opcionales (Las puede crear el stack por nosotros)
- Create a Virtual Cloud Network
- Create a Network Security Group
- Create a Private Subnet for the Oracle WebLogic Server Nodes
- Configure the Load Balancer
- Create a Subnet for the Load Balancer
- Create a Subnet for the Bastion Node
- Create a Subnet for the Mount Target
- Create a Database
- Create a Confidential Application
- Create an Application Performance Monitoring Domain
- Create an Auth Token
- Validate Existing Network Setup
Al lanzar el Wizard del Stack nos pregunta lo siguiente:
Configuracion del Stack
- Nombre
- Descripción
- Compartment
- Prefijo para los recursos que se crean.
- Clave SSH
- Creación de Policies para leer los screts y manejar transacciones con la Autonomous Database (si procede)
- Creación de una nueva VCN (Si se selecciona, se crea el bastion también)
- Provisión automática de un Bastion Instance
- Provisionar el Load Balancer
- Activar autenticación usando IDCS (Se provisiona el Load Balancer) (si no, se usa el local identity store)
- Activar logs a «OCI Logging Service)
- Activar «Application Performance Monitoring» (Requerido si se selecciona el escalado automático del stack)
- Activar Autoescalado.
- Añadir File System.
Configuración de la red
Si no se selecciona la creación de una nueva VCN.
- Seleccionar compartment
- Seleccionar RED
- Crear Nuevas Subnets? (Las siguientes opciones solo salen en caso de no chequear esta opción)
- La red está validada?
- Opciones Subnet: Compartment, Type y Span.
- ¿Usar Security Groups Existentes?
Configuración del dominio de Weblogic
- Usuario Admin
- Secret Compartment
- Secret para Admin password
- JDK Version
- Desplegar aplicación de prueba?
- Argumentos de Arranque.
- Configurar Puertos
Compute Instance
- Shape
- OCPU
- Nodos
- AD
- Subnet
Bastión
- Asignar una IP publica reservada.
- Subnet.
- Shape
Load Balancer
- Crear: ¿Private?¿IP Publica Reservada?¿Subnet?¿Ancho de Banda?
- Usar existente: IP, Backend set.
Outputs:
autoscaling_function_application_id = «»
autoscaling_scalein_monitoring_alarm_id = «»
autoscaling_scaleout_monitoring_alarm_id = «»
bastion_instance_id = «ocid1.instance.oc1.eu-frankfurt-1.antheljtedbvmxycjyypn3aqpv5zrlr6ew5yc7dnqtxw4xtsscb3esvz346a»
bastion_instance_public_ip = «129.159.241.125»
fss_system_id = «»
fusion_middleware_control_console = «»
is_vcn_peered = false
jdk_version = «JDK 8»
listing_version = «23.1.1-230118062825»
load_balancer_id = «ocid1.loadbalancer.oc1.eu-frankfurt-1.aaaaaaaacocfmrkelwm3zysjfcfx6nxwa46mccb5xh53rp5lvjffmkoqnpga»
load_balancer_ip = «130.162.216.185»
mount_target_id = «»
provisioning_status = «»
resource_identifier_value = tolist([
«wls001-f3967be6»,
])
sample_application = «https://130.162.216.185/sample-app»
sample_application_protected_by_idcs = «»
ssh_command = «ssh -i <privateKey> -o ProxyCommand=\»»ssh -i <privateKey> -W %h:%p -p 22 opc@129.159.241.125\»» -p 22 opc@<wls_vm_private_ip>»
ssh_command_with_dynamic_port_forwarding = «ssh -i <privatekey> -C -D <local-port> opc@129.159.241.125»
virtual_cloud_network_cidr = «10.0.0.0/16»
virtual_cloud_network_id = «ocid1.vcn.oc1.eu-frankfurt-1.amaaaaaaedbvmxyavuslgiarpbguipnn43duqcxcl56wd4nyk53go4y5yjhq»
weblogic_agent_configuration_id = «»
weblogic_instances = «[\»»{ Instance Id:ocid1.instance.oc1.eu-frankfurt-1.antheljtedbvmxyc4tha5bcpixgjgxxj6hk7snh55pu3rvapy6yy6lzfw4uq, Instance name:wls001-wls-0, Availability Domain:zsrk:EU-FRANKFURT-1-AD-2, Instance Shape:VM.Standard.E4.Flex, Private IP:10.0.2.162, Public IP: }\»»,\»»{ Instance Id:ocid1.instance.oc1.eu-frankfurt-1.antheljredbvmxycu67vyvvgyd6m4erlyxlvwesglnnwz6voeb6hmcn2uxha, Instance name:wls001-wls-1, Availability Domain:zsrk:EU-FRANKFURT-1-AD-3, Instance Shape:VM.Standard.E4.Flex, Private IP:10.0.2.236, Public IP: }\»»]»
weblogic_log_group_id = «»
weblogic_log_id = «»
weblogic_server_administration_console = «https://10.0.2.162:7002/console»
weblogic_version = «12.2.1.4 Enterprise Edition (Non JRF)»
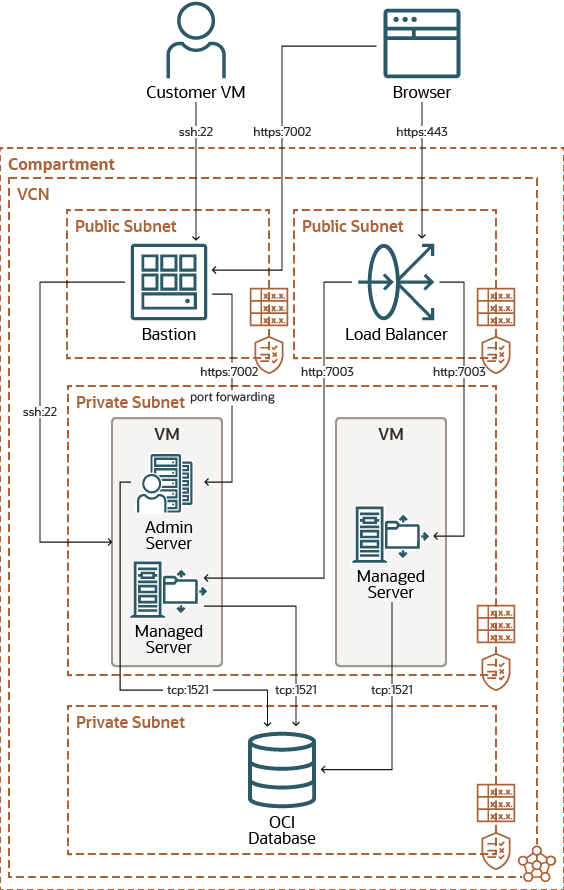
Acceso a la consola de Weblogic (En subred privada)
Se requiere un bastión y configurar reenvío de puertos dinámicos con una shell segura (SSH). Se puede usar una de las siguientes opciones:
- Usando una «Bastion instance» Access by Using the Bastion Instance.
- Usando un «Bastion service» Access by Using the Bastion Service.
Al abrir un túnel SSH con reenvío de puerto dinámico, el cliente SSH se convierte en un proxy Socket Secure (SOCKS) que escucha en el puerto que especifique. Todo el tráfico que se enruta al puerto configurado como proxy se reenvía a su destino a través del servidor proxy. Al configurar el navegador para usar un proxy SOCKS, se puede acceder a la consola de administración de un dominio privado.
- Bastion Instance
To access the WebLogic console in a private subnet by using the bastion instance, complete the following steps;
- Click the navigation menu
 , select Compute. Under the Compute group, click Instances.